")


")


Affiliate Disclaimer
Some links in this article are affiliate links. We may earn a small commission if you make a purchase through these links, at no extra cost to you. We only recommend products we find useful to our readers
Do you suffer from back pain? You’re not alone! Millions of people have backaches owing to bad posture, long hours of sitting, and muscle strain. Back pain is one of the most frequent causes of missed work or medical care.
However, what if relief was only a short distance away?
The centuries-old yoga practice provides a mild yet efficient remedy for back pain. Yoga can ease muscle tension, increase flexibility, and align the spine through focused poses, deep breathing, and mindful movements. Plus, it’s a comprehensive therapy that tackles both the physical and mental elements of pain.
The best part? You don’t have to be a yoga expert to benefit. A few basic poses done regularly can provide long-lasting relief. Take a deep breath, spread out your yoga mat, and start your path to back pain relief. Let’s look at simple yoga poses to help you feel more comfortable and relax your back!
Read More: What Is Somatic Yoga? A Beginner’s Guide to This Gentle Movement Practice
Yoga Poses for Back Pain
1. Adho Mukha Svanasana (Downward Facing Dog Pose)
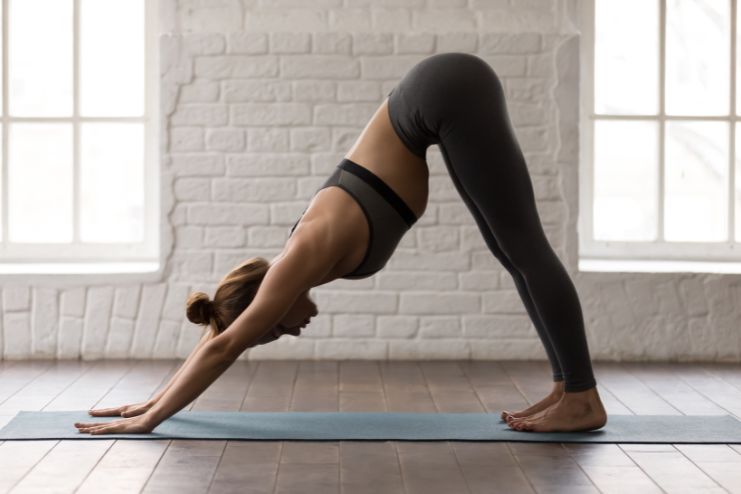
Adho Mukha Svanasana, commonly known as Downward-Facing Dog, is a fundamental yoga pose that offers numerous benefits, including strengthening the arms, shoulders, legs, and back, while stretching the hamstrings, calves, and spine. This pose also enhances blood circulation and can help alleviate back pain and sciatica.
How to Perform Adho Mukha Svanasana (Downward-Facing Dog):
- Starting Position: Begin on your hands and knees, ensuring your wrists are directly under your shoulders and knees under your hips.
- Engage Core: Tuck your toes under, engage your core muscles, and gently press your hands into the floor.
- Lift Hips: Slowly raise your hips toward the ceiling, aiming to straighten your legs and form an inverted “V” shape.
- Adjust Feet and Hands: Keep your feet hip-width apart with heels lifted off the floor, and hands shoulder-width apart with fingers spread wide, pressing firmly into the mat.
- Align Body: Ensure your body forms a straight line from wrists to hips to heels. Keep your head between your upper arms, with ears aligned with your upper arms, and gaze toward your thighs or navel.
- Hold the Pose: Maintain this position for 15-30 seconds, breathing deeply and evenly.
- Release: To come out of the pose, gently lower your knees to the floor and rest in Child’s Pose for a few breaths.
Incorporating Adho Mukha Svanasana into your yoga practice can invigorate the body, improve flexibility, and provide relief from back discomfort.
2. Balasana (Child’s Pose)
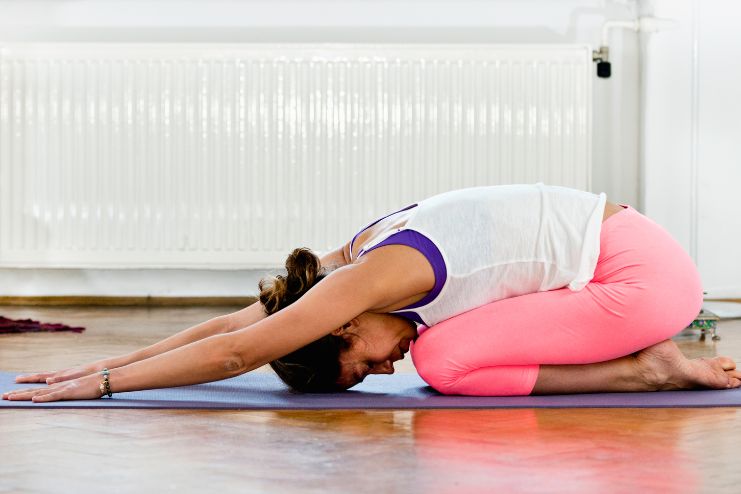
Balasana, commonly known as Child’s Pose, is a restorative yoga pose that gently stretches the lower back, hips, and thighs, offering relief from back pain and promoting relaxation.
How to Perform Balasana (Child’s Pose):
- Starting Position: Begin by kneeling on the floor with your big toes touching and knees spread hip-width apart.
- Seated Pose: Sit back onto your heels, ensuring your buttocks rest comfortably on them.
- Forward Fold: Exhale and gently lower your torso forward, bringing it between your thighs.
- Arm Placement: Extend your arms forward with palms facing down on the floor, or place them alongside your body with palms facing up, depending on what feels most comfortable.
- Relaxation: Allow your forehead to rest on the floor, keeping your neck aligned with your spine. Close your eyes and take slow, deep breaths, holding the position for 1-3 minutes.
- Returning: To release, gently lift your torso and return to the seated position on your heels.
Incorporating Balasana into your routine can alleviate lower back tension, improve spinal alignment, and provide a calming effect on the mind.
Read More: Chair Yoga for Seniors: Simple Moves to Improve Strength and Flexibility
3. Utthita Trikonasana (Extended Triangle Pose)
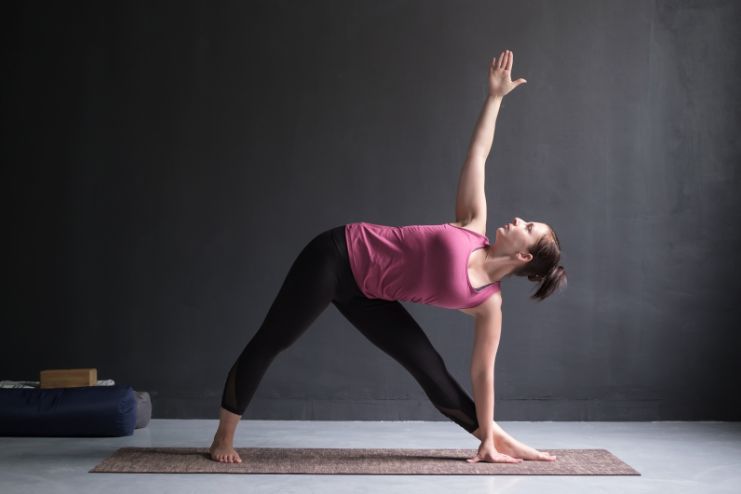
Utthita Trikonasana, known as Extended Triangle Pose, is a standing yoga posture that offers a multitude of benefits, including relieving neck, back, and sciatica pain. It strengthens the shoulders, chest, legs, and core muscles while stretching the hips, groin, hamstrings, calves, and spine. Additionally, this pose can alleviate stress and anxiety.
How to Perform Utthita Trikonasana (Extended Triangle Pose):
- Starting Position: Stand with your feet approximately four feet apart.
- Foot Placement: Turn your left foot outward at a 90-degree angle and your right foot slightly inward.
- Arm Position: Extend both arms parallel to the floor, palms facing down.
- Forward Bend: Hinge at your right hip to lean your torso forward, keeping your back straight.
- Hand Placement: Place your right hand on your right shin, ankle, or the floor, depending on your flexibility.
- Left Arm Extension: Reach your left arm toward the ceiling, keeping it in line with your shoulders.
- Gaze: Look up at your left hand, forward, or down, based on your comfort and neck flexibility.
- Hold the Pose: Maintain this position for up to one minute, breathing deeply and steadily.
- Switch Sides: Repeat the pose on the opposite side to ensure balanced benefits.
Incorporating Utthita Trikonasana into your yoga practice can enhance flexibility, strengthen key muscle groups, and promote mental well-being.
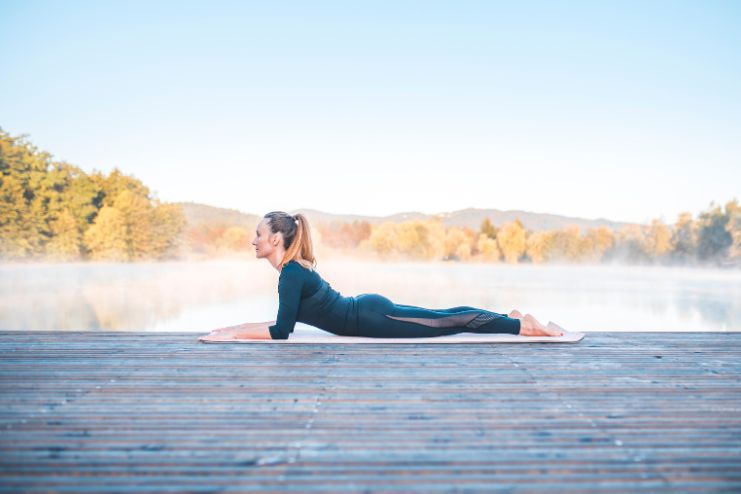
4. Bhujangasana (Cobra Pose)
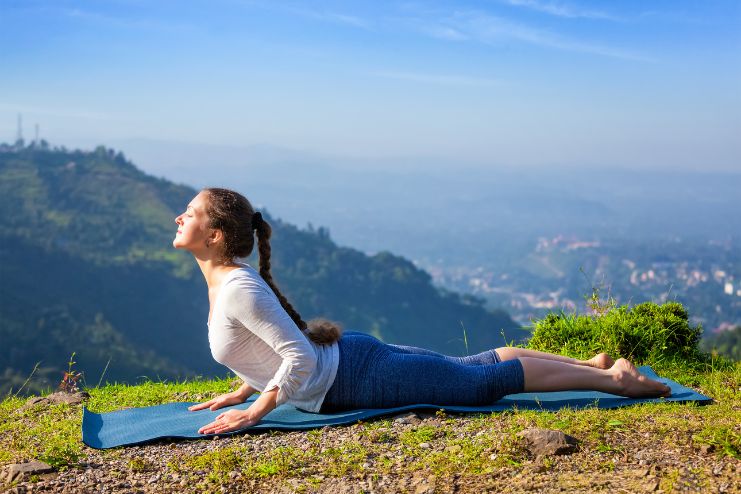
Bhujangasana, commonly known as Cobra Pose, is a gentle backbend that offers multiple benefits for individuals experiencing back pain. This pose stretches the shoulders, chest, and abdominals, potentially alleviating discomfort associated with sciatica and strengthening the spine. Additionally, it may help reduce fatigue and stress related to back pain.
How to Perform Bhujangasana:
- Starting Position: Lie on your stomach with your legs extended and the tops of your feet resting on the floor.
- Hand Placement: Place your hands under your shoulders, keeping your elbows close to your body and fingers pointing forward.
- Engage Core: Press your pubic bone into the floor and gently squeeze your buttocks.
- Lift Upper Body: Inhale and slowly lift your head, chest, and shoulders off the floor by pressing into your hands. Keep your elbows slightly bent and close to your sides.
- Deepen the Stretch: For a more intense stretch, you can lift your torso higher, ensuring your lower back remains comfortable.
- Hold the Pose: Maintain this position for 15 to 30 seconds, breathing deeply and steadily.
- Release: Exhale and gently lower your upper body back to the floor.
- Repeat: You can perform this pose 2 to 3 times, taking brief rests between each repetition.
Read More: Finding Balance: Yoga and Meditation for Seniors’ Physical and Mental Health
5. Chakravakasana (Cat-Cow Pose)
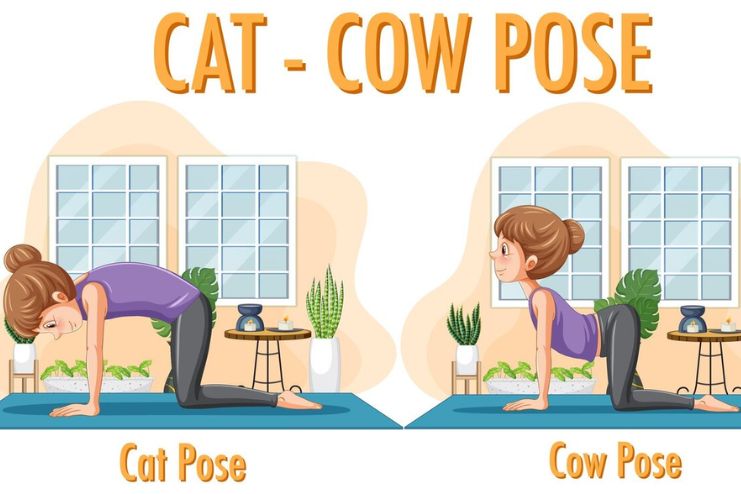
The Cat-Cow Pose, known as Chakravakasana in Sanskrit, is a gentle yoga movement that enhances spinal flexibility and alleviates back discomfort. By synchronizing breath with movement, it stretches and strengthens the back muscles, promoting overall spinal health.
How to Perform Chakravakasana:
- Starting Position: Begin on your hands and knees, ensuring your wrists are directly beneath your shoulders and your knees beneath your hips, forming a “tabletop” position.
- Inhale – Cow Pose (Bitilasana): Gently push your pelvis back, allowing your tailbone to lift. Let this movement curve up your spine, lift your chest and head forward and up. Gently gaze upward while keeping your neck relaxed.
- Exhale – Cat Pose (Marjaryasana): Press the tops of your feet into the floor. Tuck your tailbone, arching your spine up toward the ceiling. Draw your navel toward your spine and let your head drop, gazing toward your navel.
- Repeat: Continue flowing between these two positions, coordinating each movement with your breath. Perform for at least one minute, focusing on the fluidity of motion and the stretch along your spine.
This dynamic movement not only relieves tension in the back but also massages the spine, improving circulation and flexibility. It’s beneficial for individuals with a sedentary lifestyle or those experiencing back pain. Additionally, the rhythmic nature of Chakravakasana can help reduce stress and promote a sense of calm.
6. Salamba Bhujangasana (Sphinx Pose)
Salamba Bhujangasana, commonly known as Sphinx Pose, is a gentle backbend that offers numerous benefits, including strengthening the spine and stimulating abdominal organs.
How to Perform Salamba Bhujangasana (Sphinx Pose):
- Starting Position: Lie on your stomach with your legs extended behind you.
- Arm Placement: Place your forearms on the floor, palms down, ensuring your elbows are directly beneath your shoulders.
- Engage Core: Gently activate your lower abdominal muscles to support your back.
- Lift Upper Body: Slowly raise your head, chest, and shoulders off the floor by pressing into your forearms. Keep your elbows slightly bent and close to your body.
- Maintain Alignment: Ensure your spine is elongated, avoiding excessive arching in the lower back.
- Hold the Pose: Keep your gaze forward and hold this position for up to five minutes, breathing deeply and steadily.
- Release: To exit the pose, gently lower your chest and head back to the floor, and rest with your arms by your sides.
These yoga poses can help soothe your back and strengthen the muscles. It is advisable to try these poses with the guidance of an expert.
Read More: Sunday Stretch: Relaxing Recovery Yoga
When to Avoid Yoga for Back Pain
Even though yoga can be a beneficial treatment for back pain, it’s not always the best option for everyone. If your back discomfort is severe, chronic, or the consequence of a recent injury, avoid yoga until you’ve spoken with a healthcare professional. Specific movements might exacerbate conditions like herniated discs, fractures, or spinal injuries, resulting in further discomfort or consequences.
Furthermore, numbness, tingling, or weakness in your legs may indicate a more serious problem that needs to be treated immediately. A physician or physical therapist can provide an accurate diagnosis and individualized therapy recommendations.
Following clearance, practicing moderate yoga under the supervision of a trained instructor can aid in recuperation. It’s crucial to put your safety first, pay attention to your body, and refrain from ignoring discomfort. Your health is the most important thing!
Conclusion
Yoga is a safe and efficient means of treating back pain by gradually strengthening and extending muscles, increasing flexibility, and encouraging relaxation. Frequent practice can improve posture, ease stress, and promote the general health of the spine. Yoga’s mindfulness component also encourages stress reduction and mental clarity, which can lessen discomfort.
Consistency is essential. Start slowly, pay attention to your body, and adjust your poses as necessary. With perseverance and commitment, you’ll see notable progress.
Have you attempted any of these yoga poses to relieve back pain? Please share your experience with us! Please feel free to leave any questions, comments, or suggestions in the space provided below. Let’s help one another on this path to a pain-free and healthier back!
-
Mar 2017Written by Pradeepa Polineni
-
Apr 2025Edited by Ankita
In this Article